SEO pour Drupal – Comment améliorer le référencement de son site Drupal ?
Drupal offre une approche assez simple pour l’optimisation SEO. En effet, vous…

Vous souhaitez gérer un ensemble de ressources pour votre entreprise en interne et voulez transformer votre site WordPress en intranet à cet effet? Ne cherchez pas loin, nous avons la solution pour vous. WordPress, étant, en effet, la plateforme de gestion de site la plus populaire, propose un ensemble d’outils facilement exploitables par tous. La plateforme offre, par exemple, la possibilité de gérer les codes sources du site ou juste d’installer une extension pour ajouter des fonctionnalités. Notre équipe a d’ailleurs mis notre expertise à contribution pour développer une extension pour l’intranet WordPress. Dans cet article, nous vous expliquons alors comment transformer WordPress en intranet. Pour cela, nous vous proposerons deux approches: une approche pour les développeurs (sans extension) et une autre avec extension (aucun code).
Un intranet est une plateforme numérique sécurisée et privée, spécifiquement conçue pour répondre aux besoins de communication et de collaboration au sein d’une entreprise. En tant que gestionnaire d’entreprise, un intranet vous procure un espace centralisé où vos employés peuvent accéder à des informations essentielles, partager des idées, collaborer sur des projets et accélérer les processus internes. Grâce à cette solution technologique interne, vous pouvez ainsi renforcer la communication interne, stimuler la collaboration entre les équipes, améliorer la productivité et protéger les informations confidentielles de votre entreprise. L’intranet devient alors un outil stratégique pour optimiser les opérations, favoriser l’efficacité et encourager l’innovation au sein de votre organisation.
En tant que gestionnaire d’entreprise, la transformation de votre site web en intranet vous apporte de nombreux avantages substantiels. Voici une liste des bénéfices que vous pouvez obtenir en procédant à cette transformation :
L’intranet permet une diffusion rapide et efficace des informations au sein de votre organisation. En centralisant les annonces, les mises à jour, les politiques et les procédures, vous assurez une transmission transparente des informations à tous les membres de l’entreprise. De plus, cela dynamise la collaboration et l’alignement entre les différents départements et équipes.
Grâce à l’intranet, vous créez un espace de travail collaboratif, promouvant une collaboration plus efficace entre les employés. Les espaces de projet, les forums de discussion et les outils de partage de documents facilitent l’échange d’idées, incitent la coopération entre les équipes et permettent une résolution rapide des problèmes.
L’intranet propose un accès simplifié aux informations pertinentes de l’entreprise. Vous pouvez centraliser les documents, les manuels, les politiques, les procédures et les bases de connaissances, permettant aux employés de trouver rapidement les informations nécessaires. Cela améliore leur productivité en évitant les recherches fastidieuses et en favorisant une utilisation plus efficace des ressources internes.
L’intranet vous permet d’automatiser les processus internes, ce qui réduit les tâches administratives manuelles et améliore l’efficacité opérationnelle. Grâce à des flux de travail automatisés, des formulaires en ligne et des demandes de congé électroniques, vous accélérez les processus, réduisez les erreurs et les attentes, et libérez du temps pour des tâches à plus forte valeur ajoutée.
En transformant votre site web en intranet, vous créez une plateforme pour la gestion des connaissances au sein de votre entreprise. Vous pouvez partager des tutoriels, des guides, des FAQ, des formations et d’autres ressources éducatives pour améliorer les compétences et les connaissances des employés. Cela soutiens un apprentissage continu et une meilleure rétention des connaissances.
L’intranet renforce la sécurité de vos données confidentielles. Grâce à des mesures de sécurité avancées telles que des authentifications sécurisées, des contrôles d’accès et des pare-feu, vous protégez les informations sensibles de votre entreprise contre les accès non autorisés et les violations de sécurité.
Pour transformer votre site WordPress en intranet sans utiliser d’extension, il sera nécessaire de maîtriser le code à un certain niveau. Ainsi, des compétences en développement web seront requises pour choisir cette alternative. Dans les paragraphes suivants, nous vous présenterons en détail la procédure à suivre. Cependant, il est important de souligner que la manière dont vous utiliserez votre intranet dépendra de vos besoins spécifiques. En effet, certains responsables d’entreprises souhaiteront utiliser l’intranet comme un canal de communication privé, tandis que d’autres le verront comme un portail de formation en ligne. Par conséquent, votre approche sera guidée par ces besoins particuliers. Dans cette section, nous explorerons quelques lignes de code qui vous permettront de restreindre l’accès à votre contenu WordPress, et ainsi de transformer votre site en intranet.
Pour y arriver, vous pouvez soit créer un page de connexion personnalisée grâce à la fonction wp_login_form, soit tout simplement rediriger vos utilisateurs vers la page de connexion de WordPress. Voici un exemple de code que vous utilisez potentiellement.
<?php
/**********************************************
 *         Option for a custom login Page
 *
 * *************************************/


function redirect_non_logged_in_users() {
    $login_id = 10;
    $registration_id = 11;
    if (!is_user_logged_in() && !is_page($login_id) && !is_page($registration_id)) {
        wp_redirect(get_permalink($login_id));
        exit;
    }
}
add_action('template_redirect', 'redirect_non_logged_in_users');


/**********************************************
 *  redirect users to the default login
 *
 * *************************************/


 function redirect_non_logged_in_users() {
    if (!is_user_logged_in()) {
        wp_redirect(wp_login_url( get_permalink() ));
        exit;
    }
}
add_action('template_redirect', 'redirect_non_logged_in_users');
?>
Le code est structuré en deux parties, pour deux situations possibles. La première est pour le cas où vous souhaiteriez avoir une page de connexion personnalisée. Toutefois, dans le second cas, les utilisateurs seront redirigés vers la page de connexion par défaut de WordPress.
Si vous utilisez une page personnalisée pour la connexion à votre site web WordPress, vous pouvez, entre autres, créer un code court pour afficher le formulaire de connexion sur la page de connexion. C’est, en effet, ce que nous vous montrerons dans la suite.
Grâce à cette fonction, vous créez un code court qui s’exécutera sur la page de connexion. Il sera ensuite question de remplacer le lien de la page de connexion par défaut par le lien de votre page. Dans ce cas, vous pouvez exclure la page de connexion de la redirection (voir la première fonction).
function redirect_non_logged_in_users() {
    $login_id = 10;
    $registration_id = 11;
    if (!is_user_logged_in() && !is_page($login_id) && !is_page($registration_id)) {
        wp_redirect(get_permalink($login_id));
        exit;
    }
}
add_action('template_redirect', 'redirect_non_logged_in_users');
Dans la fonction ci-dessus, on suppose que la page de connexion possède comme identifiant «10». La fonction pour la page de connexion sera alors semblable au code ci-dessous.
function wpdocs_log_me_shortcode_fn() {
ob_start();
if(!empty($this->custom_id('d'))) {
$url = get_permalink($this->custom_id('d'))."?clear=".uniqid();
} else {
$url = get_permalink( get_the_ID() )."?clear=".uniqid();
}
$args = array(
'echo' => true,
'redirect' => $url,
'remember' => true,
'value_remember' => true,
);

wp_login_form( $args );
return ob_get_clean();
}

add_shortcode( 'wpdocs_log_me', 'wpdocs_log_me_shortcode_fn');
Enfin, vous pouvez intégrer le code court dans l’éditeur de WordPress pour afficher le formulaire.
Nous vous proposons notre extension WordPress pour créer un intranet à partir de votre site web WordPress. En plus des outils décrits ci-dessus, nous avons inclus des fonctionnalités qui pourraient vous faciliter la vie.
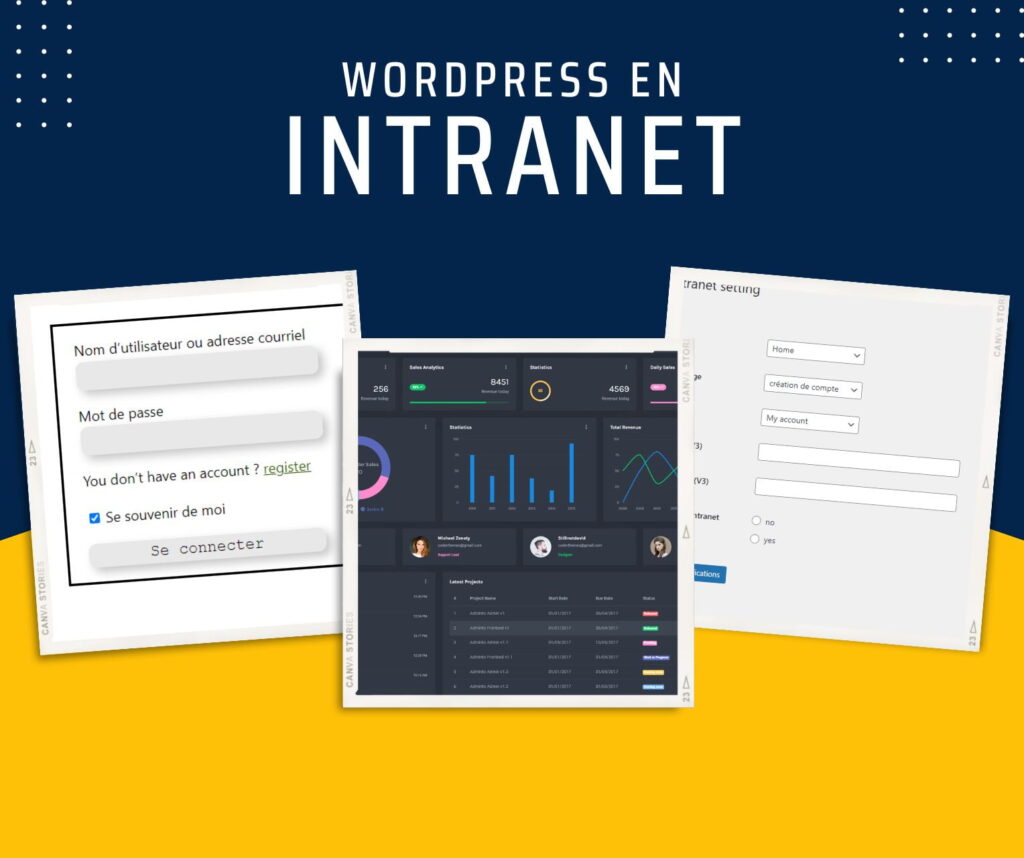
Notre extension, disponible dans notre boutique d’extensions, tend à simplifier la création d’un intranet sécurisé basé sur WordPress. Vous n’aurez pas besoin de toucher au code, car quelques clics suffiront pour obtenir un résultat satisfaisant. Voici les étapes à suivre :
1. Installez l’extension sur votre site web.
2. Effectuez les configurations de base, telles que la sélection de la page de création de compte et de connexion.
3. Si votre site web ne nécessite pas de connexion, vous pouvez choisir de ne pas afficher la page de connexion.
4. Si vous souhaitez que vos utilisateurs disposent d’un panneau de configuration dédié, sélectionnez la page correspondante.
Une fois que vous avez effectué ces configurations, les utilisateurs seront automatiquement redirigés vers la page de connexion s’ils ne sont pas déjà connectés.
D’une manière générale, la transformation d’un site WordPress en intranet implique de limiter l’accès à votre site uniquement aux utilisateurs autorisés. Voici les étapes à suivre pour y parvenir :
Il existe plusieurs plugins WordPress qui vous permettent de restreindre l’accès à votre site. Parmi les plus populaires, on trouve alors “Restricted Site Access” et “WP Private Content Plus”. Installez l’un de ces plugins à partir de votre tableau de bord WordPress en allant dans Extensions > Ajouter.
Après avoir installé et activé le plugin, vous devez le configurer pour limiter l’accès à votre site.
Pour “Restricted Site Access” :
Pour “WP Private Content Plus” :
Pour permettre à vos employés ou membres de votre organisation d’accéder à l’intranet, vous devez leur créer des comptes utilisateurs. Pour cela, allez dans Utilisateurs > Ajouter et remplissez les informations requises pour chaque utilisateur. De plus, assurez-vous de définir le rôle approprié pour chaque utilisateur (administrateur, éditeur, auteur, contributeur ou abonné) en fonction des permissions souhaitées.
Pour renforcer la sécurité de votre intranet, vous pouvez installer un plugin de connexion sécurisée, tel que “Two Factor Authentication” ou “Google Authenticator – Two Factor Authentication (2FA)”. Cela ajoutera une couche de sécurité supplémentaire en exigeant une authentification à deux facteurs pour se connecter au site.
Pour permettre à vos utilisateurs d’accéder à l’intranet, veillez à communiquer les informations de connexion essentielles, telles que leurs identifiants (nom d’utilisateur ou adresse e-mail) et leurs mots de passe. Informez-les également de l’URL spécifique de votre intranet. Ainsi, ils pourront se connecter en utilisant ces informations pour accéder au site en toute sécurité. Assurez-vous de fournir des instructions claires sur la procédure de connexion et de souligner l’importance de garder leurs informations de connexion confidentielles.
Après avoir suivi ces étapes, votre site WordPress aura été transformé en intranet sécurisé, limitant ainsi l’accès uniquement aux utilisateurs autorisés. Si vous avez des questions supplémentaires ou si vous désirez en savoir plus sur notre solution d’intranet, contactez-nous. Notre équipe se fera un plaisir de vous assister et de répondre à toutes vos interrogations.


Nous utilisons des cookies pour améliorer votre expérience. Politique de confidentialité


Gilblas is a senior entrepreneur and developer with around 13 years of experience, deeply involved in the WordPress community. He helps SMEs grow through custom web solutions and training. He stands out for his ability to automate and industrialize website creation through Phoenix Forge.