Method of payment and prerequisites.
It should be noted that gateways such as Stripe or Moneris also offer this possibility. If you use a solution apart from PayPal, you can leave us a message, it would be a pleasure to write an article, especially for you on this solution.
Prerequisites for adding the PayPal payment form to your website
- Have a PayPal business account
- Generate an API key
- be able to copy and paste the codes
- If you’re not too savvy with computers, be able to paste in a location on your web page.
Steps to add a payment method on your pages.
Below are the steps to follow:
Step 1: Log in to your PayPal account
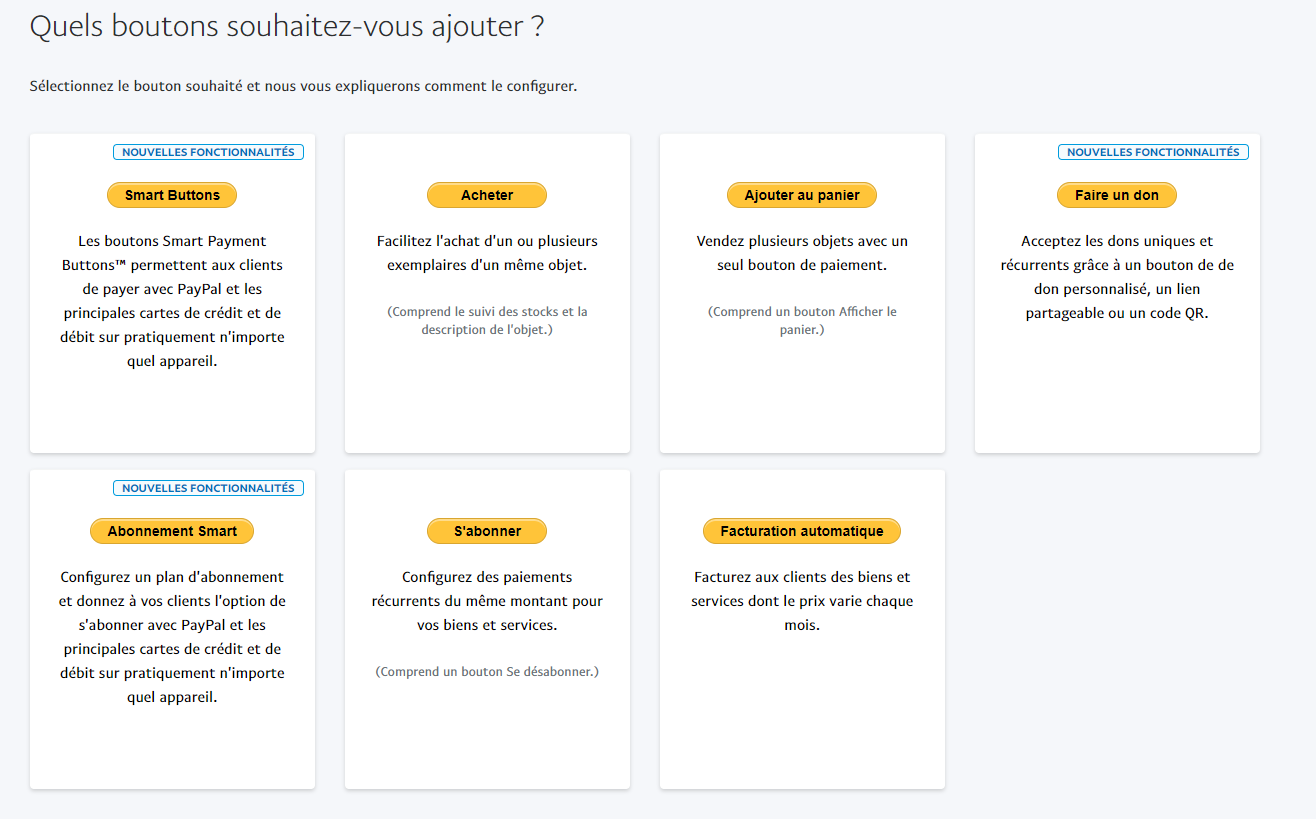
Once logged into your PayPal account, go to the “Pay and get paid” tab and then click on the “PayPal Buttons” button.  PayPal gives you several options from which you can choose the one that best fits your goals. As far as we are concerned, we will choose “Smart Buttons”
Step 2: Customize the “Smart Buttons”
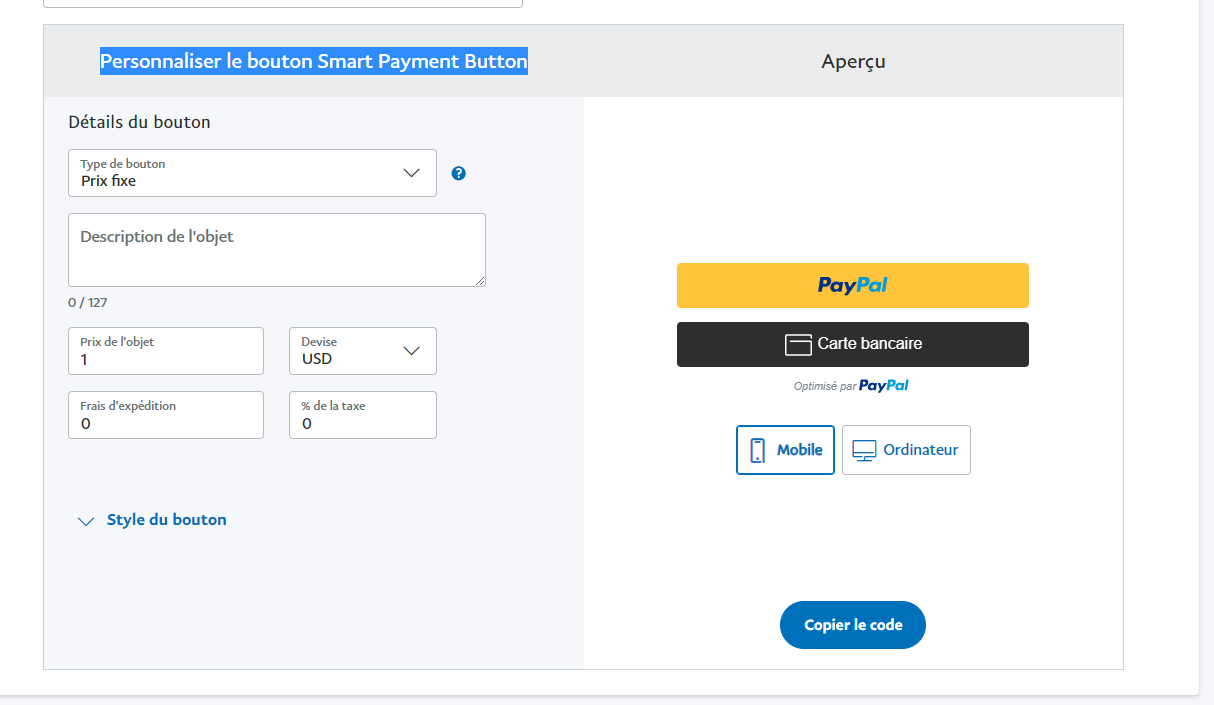
 In the personalization screen, you have various options available to you. We will see together how to better configure your code.
- In the first field, “Button type”, you must select the option that suits you. You must also decide between a fixed price, a single selection list, or a variable price, We will recommend you pick a Variable price. Indeed, the variable price option gives you more flexibility in terms of the amount to add to your web page.
- The second proposed field is “Description of the object”. This is the title you will want to give to your transaction. For this field, the payer can have the possibility to put his title, or you can force it with HTML.
- You have other tabs such as shipping costs (if you are selling a physical product), currency, and tax percentage.
For our mini-tutorial, we will fill in as follows:
- For “Button type” we will choose Variable price
- In the second field, we will write “Please enter the title of your product”
- Next, we will select the currency “CAD” for the Canadian dollar
- And as the label of the amount field, we will put “Amount to pay”
Eventually, we would have a design similar to the photo below  Just at the bottom of the page, you can see the “Copy Code” button. You simply need to click on this button to copy the HTML code to paste into your website. The contents of the code will be similar to what you see below. Important Note: In the code above, the only information that changes from user to user is the customer key. In other words, you can customize the code for your site by retrieving just your customer key. Then you must make the modification at the link level https://www.paypal.com/sdk/js?client-id=xxxxxx&enable-funding=venmo¤cy=CAD
Step 3: Paste the code you copied from the PayPal site
You need to paste the code on your website. The location can vary greatly depending on the solution you use. If you are using a static HTML website, you need to open your site’s HTML document and put where you want the button to appear. See a demonstration in the video below.
[Prosite_video key=’NCL4J7jHZ0w’ title=’Add Paypal to your website in seconds’ img_url=’/wp-content/uploads/2021/07/passerelle-paiement.webp’ ]
In case you use a content manager, you can paste it into one of your pages. If you have a WordPress website, we’ve developed an extension that can help you set it up in minutes.
[the_call_to_action title=”You can click the link below to download the extension for free” action_text=”Download” action_type=”modal” action_link=”exampleModal” data_title=”Get the download link the extension directly in your email ” data_action =” download ” data_link=”prositeweb_paiement”]
How to use the WordPress extension to add a PayPal payment form on any page of your website?
Thanks to our extension, you will be able to add payment forms dynamically on your WordPress pages. The mode of use is simple and fast. In the following, we will explain how to do this.
1. Get a copy of the extension
To get a copy of the extension, you can click the button above. Once you have done so, we will send you a confirmation email with the download link.
2. Activate and configure the extension
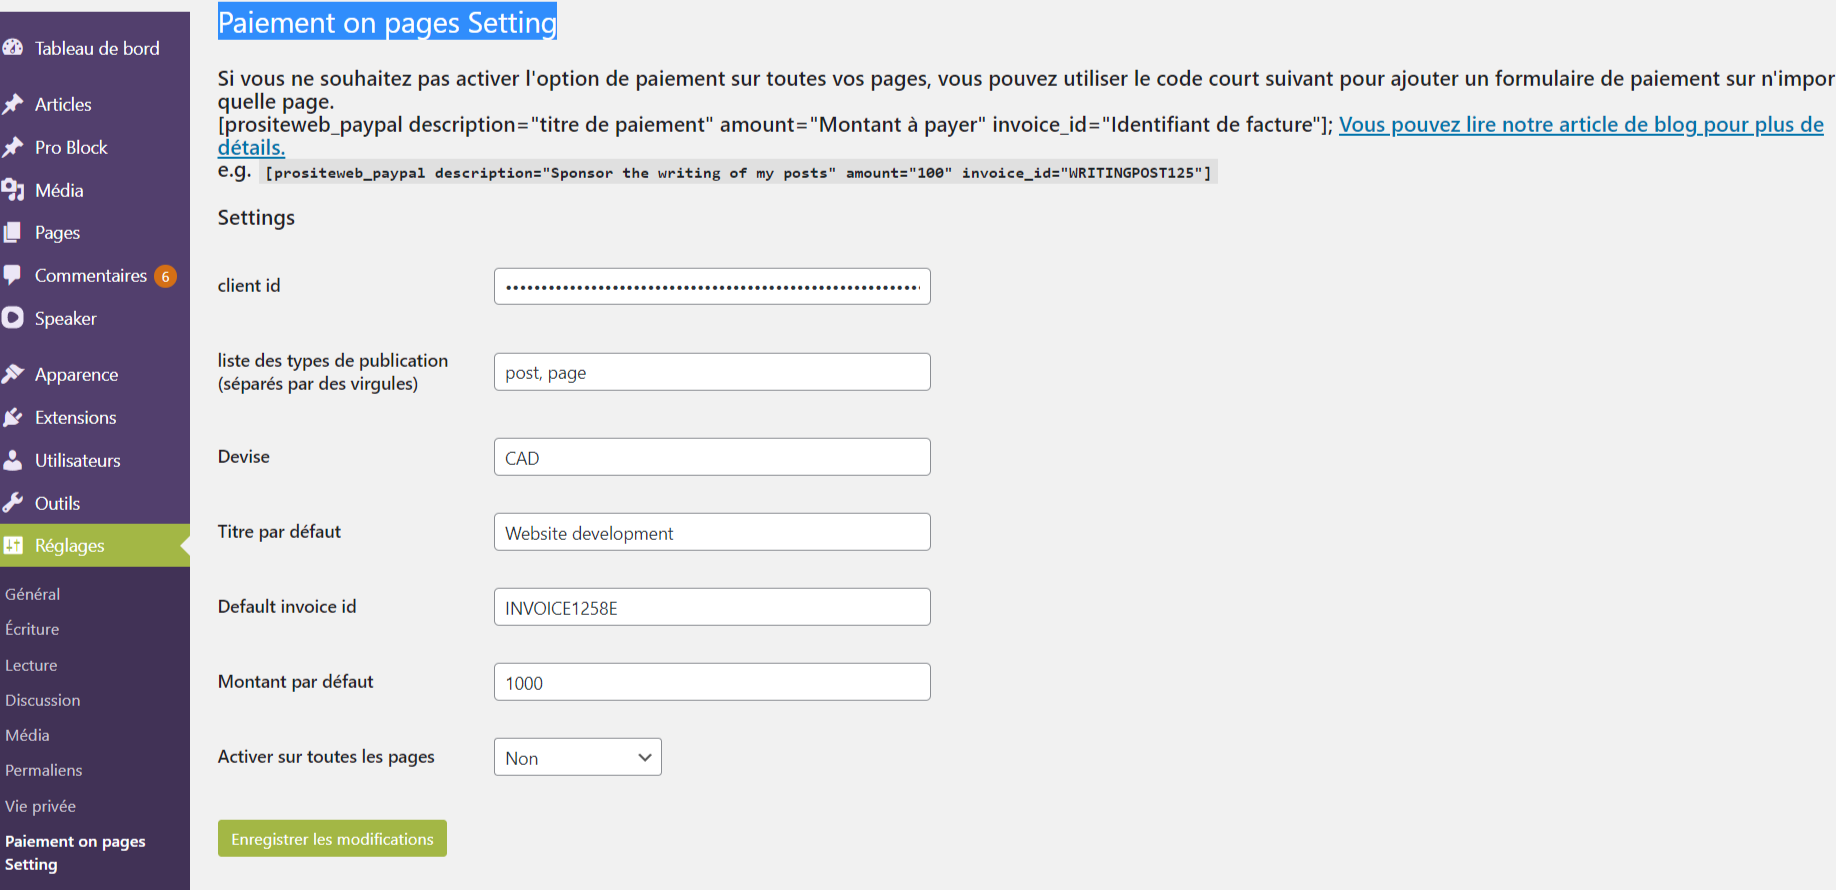
When you have activated the extension, in the “Setting” tab you will see the option “Payment on pages Setting”. Click on this tab and then perform the configuration of the extension. Among other things, you will have to provide:
- Your customer key (PayPal)
- The types of publications where you want the form to appear
- The currency, the default title, the invoice identifier, then the default amount.
- Afterward, you must select whether you want the form to appear on all pages or not.
If you select yes, the form will be below all the contents of the pages with the type option you selected. Otherwise, you must use the shortcode provided to display the form where you want.  The ID key is simply the information that you will find just after client-id of the link https://www.paypal.com/sdk/js?client-id=xxxxxx&enable-funding=venmo¤cy=CAD. If you have trouble getting it, contact us . It would be a pleasure to assist you.
In summary
Adding a payment form to a page is relatively easy. You do not necessarily need to create an entire online store for this purpose.


Gilblas is a senior entrepreneur and developer with around 13 years of experience, deeply involved in the WordPress community. He helps SMEs grow through custom web solutions and training. He stands out for his ability to automate and industrialize website creation through Phoenix Forge.